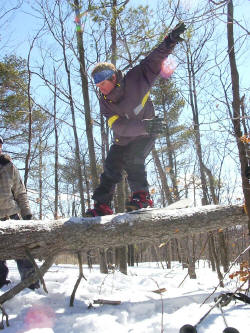
So you picked up the latest snowboard mag or one of the newest videos
that are in your local shops and you noticed your favorite rider sliding a
rail. You too have gotten comfortable enough on your board that you would
like to try sliding a rail. The following step-by-step process will help you
get started. So put on your crash pads and all other safety equipment, and
lets begin!
Rail Selection: This is a crucial step in the learning process. Donít get
frustrated because youíre not sliding a 40 foot straight rail or a
down-flat-down like the pros, this will come in time. Pick a rail that is
short and has a ride on approach and is also low to the ground. You also
should pick a flat rail that is wide, or possibly a box, just to get the
feel of riding on something other than snow.
Editor's note: Ideally the path up to the rail should be smooth, not
cruddy or icy. And the rail should be along the fall line of the mountain.
If it is skewed across the fall line, gravity will be one extra force to
fight, and you don't need that when you're starting out. If the conditions
don't seem good for your early rail rides, wait for another session. You
want to have a good chance of success your first times out.
The Approach: One of the best ways to approach any object in a park is to
shadow a rider that is better than you. Simply follow them from a distance
to get an idea of the amount of speed needed for the feature in the park. In
this case, you would just need enough speed to carry you to the end of the
rail or box. Approach the rail straight on the way you would when riding
straight down the mountain and ride across the rail this way, which is known
as a 50-50.
On the Rail: Remember to keep your weight centered on the rail and keep
your knees slightly bent, arches of you feet should be centered over the
rail which would leave 50 percent of the board on either side, hence giving
the name 50-50. Your toes, knees and shoulders should all be aligned with
one another through the motion.
Also remember that you are on a non-snow feature. Metal is faster than
snow and boxes vary depending on weather conditions (sometimes sticky,
sometimes quick). As you're riding on the rail you want to make the end of
that rail your focal point and concentrate on that. **Note: If you feel
yourself losing your center of balance on the rail, donít fight it, just
jump off the rail to avoid injury.
Prepare for Landing: As you approach the end of the rail prepare to
absorb that shock by keeping your legs loose. Give yourself enough room to
bend your knees and absorb the landing. Then ride away and prepare for the
next feature in the park. Always move far enough away from the landing of
any feature to avoid collisions.
Congratulations you just rode your first rail!!!!!!
Now just practice over and over until youíre comfortable and you can
start progressing little by little on different rails.
 About the Author - Jon Callahan
Birthdate: 09/13/1981
Sponsors: Rossignol, Demon, Eyesor
Years Riding: 10
Years Sponsored: 3
Favorite Trick: Frontside 360
Grew Up: New Jersey
Winter Residence: Where ever there is snow
Riding preference: Pipe, Slopestyle, & Backcountry
Read about the editor of SnowboardSecrets.com first time ever riding
rails, at Tricia Byrnes snowboard camp in VT at
http://www.snowboardsecrets.com/triciacamp.htm
5th paragraph down from the top.

